

Data loss can have devastating consequences for websites, businesses, and individuals alike. That’s why implementing a robust backup and restore strategy is essential for safeguarding valuable data and ensuring business continuity. Fortunately, cPanel offers powerful tools to facilitate backup and restore operations, making it easy to protect your website’s files, databases, and email accounts. In this article, we’ll explore the step-by-step process of backing up and restoring data in cPanel, empowering you to proactively protect your digital assets.

Step 1: Accessing the Backup Wizard in cPanel
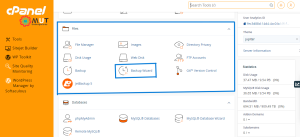
To initiate the backup process, log in to your cPanel account using your credentials. Once logged in to cPanel, navigate to the “Files” section and click on the “Backup Wizard” option. This will launch the Backup Wizard interface, where you can manage backup and restore operations for your website.
Step 2: Creating a Full Backup
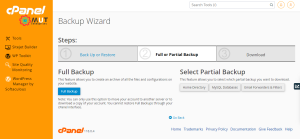
In the Backup Wizard interface, you’ll find options to create full or partial backups of your website’s files, databases, and email accounts. To create a full backup, click on the “Backup” button and select the “Full Backup” option. You can choose to generate the backup in either a “Home Directory” or a “Remote FTP Server.” Follow the on-screen instructions to initiate the backup process.
Select Backup Option:
Step 3: Downloading Backup Files
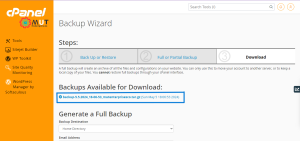
Once the backup process is complete, you’ll receive a notification indicating that the backup file is ready for download. Click on the “Download” button to retrieve the backup file to your local computer. It’s essential to store backup files in a secure location to prevent data loss in the event of a system failure or security breach.
Step 4: Restoring Backup Files
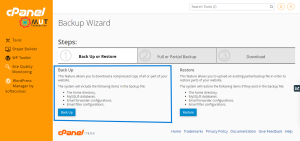
In the event of data loss or corruption, you can restore your website’s files, databases, and email accounts using the Backup Wizard interface. To restore files from a backup, navigate to the Backup Wizard interface and click on the “Restore” button. You’ll be prompted to select the type of backup you wish to restore (Full or Partial) and the location of the backup file. Follow the on-screen instructions to complete the restoration process of your website.
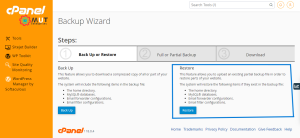
Select Restore Type and follow the Instructions:

Step 5: Configuring Backup Settings
To automate backup operations and ensure regular data protection, you can configure backup settings in cPanel. In the Backup Wizard interface, click on the “Backup Configuration” option to access backup settings. Here, you can specify the backup frequency, retention period, and destination for backup files. By scheduling regular backups and storing them securely, you can minimize the risk of data loss and maintain business continuity.
Conclusion:
Implementing a backup and restore strategy is essential for protecting your website’s data and ensuring resilience against unforeseen events. With cPanel’s intuitive Backup Wizard interface, you can easily create, download, and restore backups of your website’s files, databases, and email accounts. By following the step-by-step process outlined in this guide and configuring backup settings to suit your needs, you can proactively safeguard your digital assets and mitigate the impact of data loss incidents.