

Nameservers are essential components of the Domain Name System (DNS), responsible for translating domain names into IP addresses and directing internet traffic to the appropriate servers. Changing nameservers is a common task for website owners who wish to host their websites with a different hosting provider or integrate third-party services. If your domain is registered with Namecheap, a popular domain registrar, the process of changing nameservers is straightforward and can be completed through the Namecheap dashboard. In this article, we’ll provide a comprehensive guide on how to change nameservers on Namecheap, empowering you to manage your domain’s DNS settings effectively.
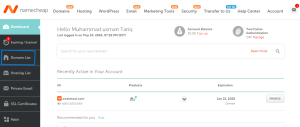
Step 1: Log in to Your Namecheap Account
Begin by logging in to your Namecheap account using your username and password. Once logged in, you’ll be directed to the Namecheap dashboard, where you can manage your domains and other services.
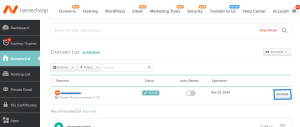
Step 2: Navigate to Domain List
In the dashboard, locate the “Domain List” section, which contains a list of all the domains registered under your Namecheap account. Click on the manage next to domain on what you want to change the nameservers. This will take you to the DNS page.
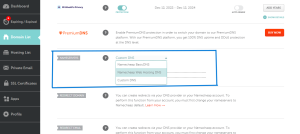
Step 3: Access Nameserver Settings
On the domain management page, look for the “Nameservers” section or the “Nameserver Management” option. Click on it to access the nameserver settings for your domain.

Step 4: Choose Nameserver Configuration
In the nameserver settings, you’ll have the option to choose between Namecheap’s default nameservers or enter custom nameservers provided by your new hosting provider or third-party service. If you’re switching hosting providers, you’ll typically receive the new nameserver information from your new hosting provider.
Step 5: Enter New Nameserver Information
If you choose to use custom nameservers, enter the nameserver information provided by your hosting provider or third-party service into the designated fields. You may need to enter multiple nameservers, depending on the configuration provided.
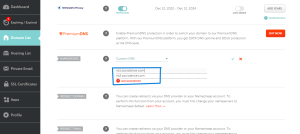
Step 6: Save Changes
After entering the new nameserver information, click on the “Save Changes” or “Update” button to apply the changes. Namecheap may prompt you to confirm the changes before proceeding.

Step 7: Verify Nameserver Update
Once you’ve saved the changes, it may take some time for the nameserver update to propagate across the internet. You can use online tools like “What’s My DNS” or “DNS Checker” to verify that the new nameservers have been successfully updated for your domain.
Conclusion:
Changing nameservers on Namecheap is a straightforward process that allows you to control where your domain’s internet traffic is directed. By following the step-by-step guide outlined in this article, you can update nameservers for your domain with ease and ensure seamless connectivity to your website, email, and other online services. Whether you’re switching hosting providers or integrating third-party services, mastering the process of changing nameservers empowers you to manage your domain’s DNS settings effectively.